As we’re reviving our blog, we thought it would be great to introduce a series that is about photography and film making itself. Terminology, basics, techniques and hacks. At some point we hope to get other photographers to share their best practices or their newest “how-to”. Let’s see where this takes us. Our final goal is to see people flourish in what they love doing – so we want to help in the best ways we can. And since we’re kind of into this photography thing, we want to engage with other photographers and filmmakers all over the world. So if you love your camera or are just getting started: This is the right place for you. :-)
We know, in general, there are many ways to reach a certain goal. It’s the same when taking photos or videos. That’s why, whenever we or someone else posts something, we want to start a conversation and discuss ideas.
Today, we want start off the series by looking into some of the basics behind long exposures.
LONG EXPOSURE PHOTOGRAPHY
A small excursion into the making of a photo: A photo needs exposure to be able to show what you photographed. Exposure is the amount of light hitting the electronic image sensor – or in earlier days – the photographic film. It determines how bright or dark a picture is in the end. This is variable, so the “perfect” exposure length varies from photo to photo. It all depends on the effect you want to achieve. In the end there is no „correct“ exposure length for a given subject – in the end it is very much subjective.
In photography, the exposure is determined by the shutter speed, aperture (the opening of the lens) and ISO (which basically controls the brightness and darkness of your photo). It’s a formula of three variables. For long exposures, you still consider all three variables. But here, shutter speed is the significant factor: It is the only variable that actually has a connection to time. That’s why it’s called “LONG” exposure. So the idea behind the long shutter speed is, that, because of the time factor, you’re able to catch (more) movement – things that happen over a period of time. And in the end, movement is what makes for a typical long exposure shot.
Typical scenarios where long exposures are used:Night Photography
Night photography deserves an own article since the topic is huge. There are many ways to take photos at night, but one thing is certain: To avoid a super dark photo and a lot of noise (due to high ISO), you have to use a slow shutter speed. Even with a very low aperature (lower than f2), at some point the lens cannot be more open to catch more light.

Star Trails
Even though it’s part of night photography, catching star trails is a category of its own. It involves special techniques (bulb mode, stacking etc.) and a lot of preparation and timing. The idea behind it is to catch the stars’ movement, caused by the earth’s rotation, which creates fascinating light trails.
Light Painting
Here, you keep the scene very dark and use a light source (flashlight, fire, smartphone LED) to “paint” something in the air. As the shutter stays open and the (bright) light source is moving, you get crystal clear lines of light. You can even write entire sentences this way.

Water-Long-Exposures
Long exposures of moving water create a very mystic/misty look. It’s quite often used in combination with the HDR technique. The objects framing the water stay sharp – this creates tons of interesting composition options.
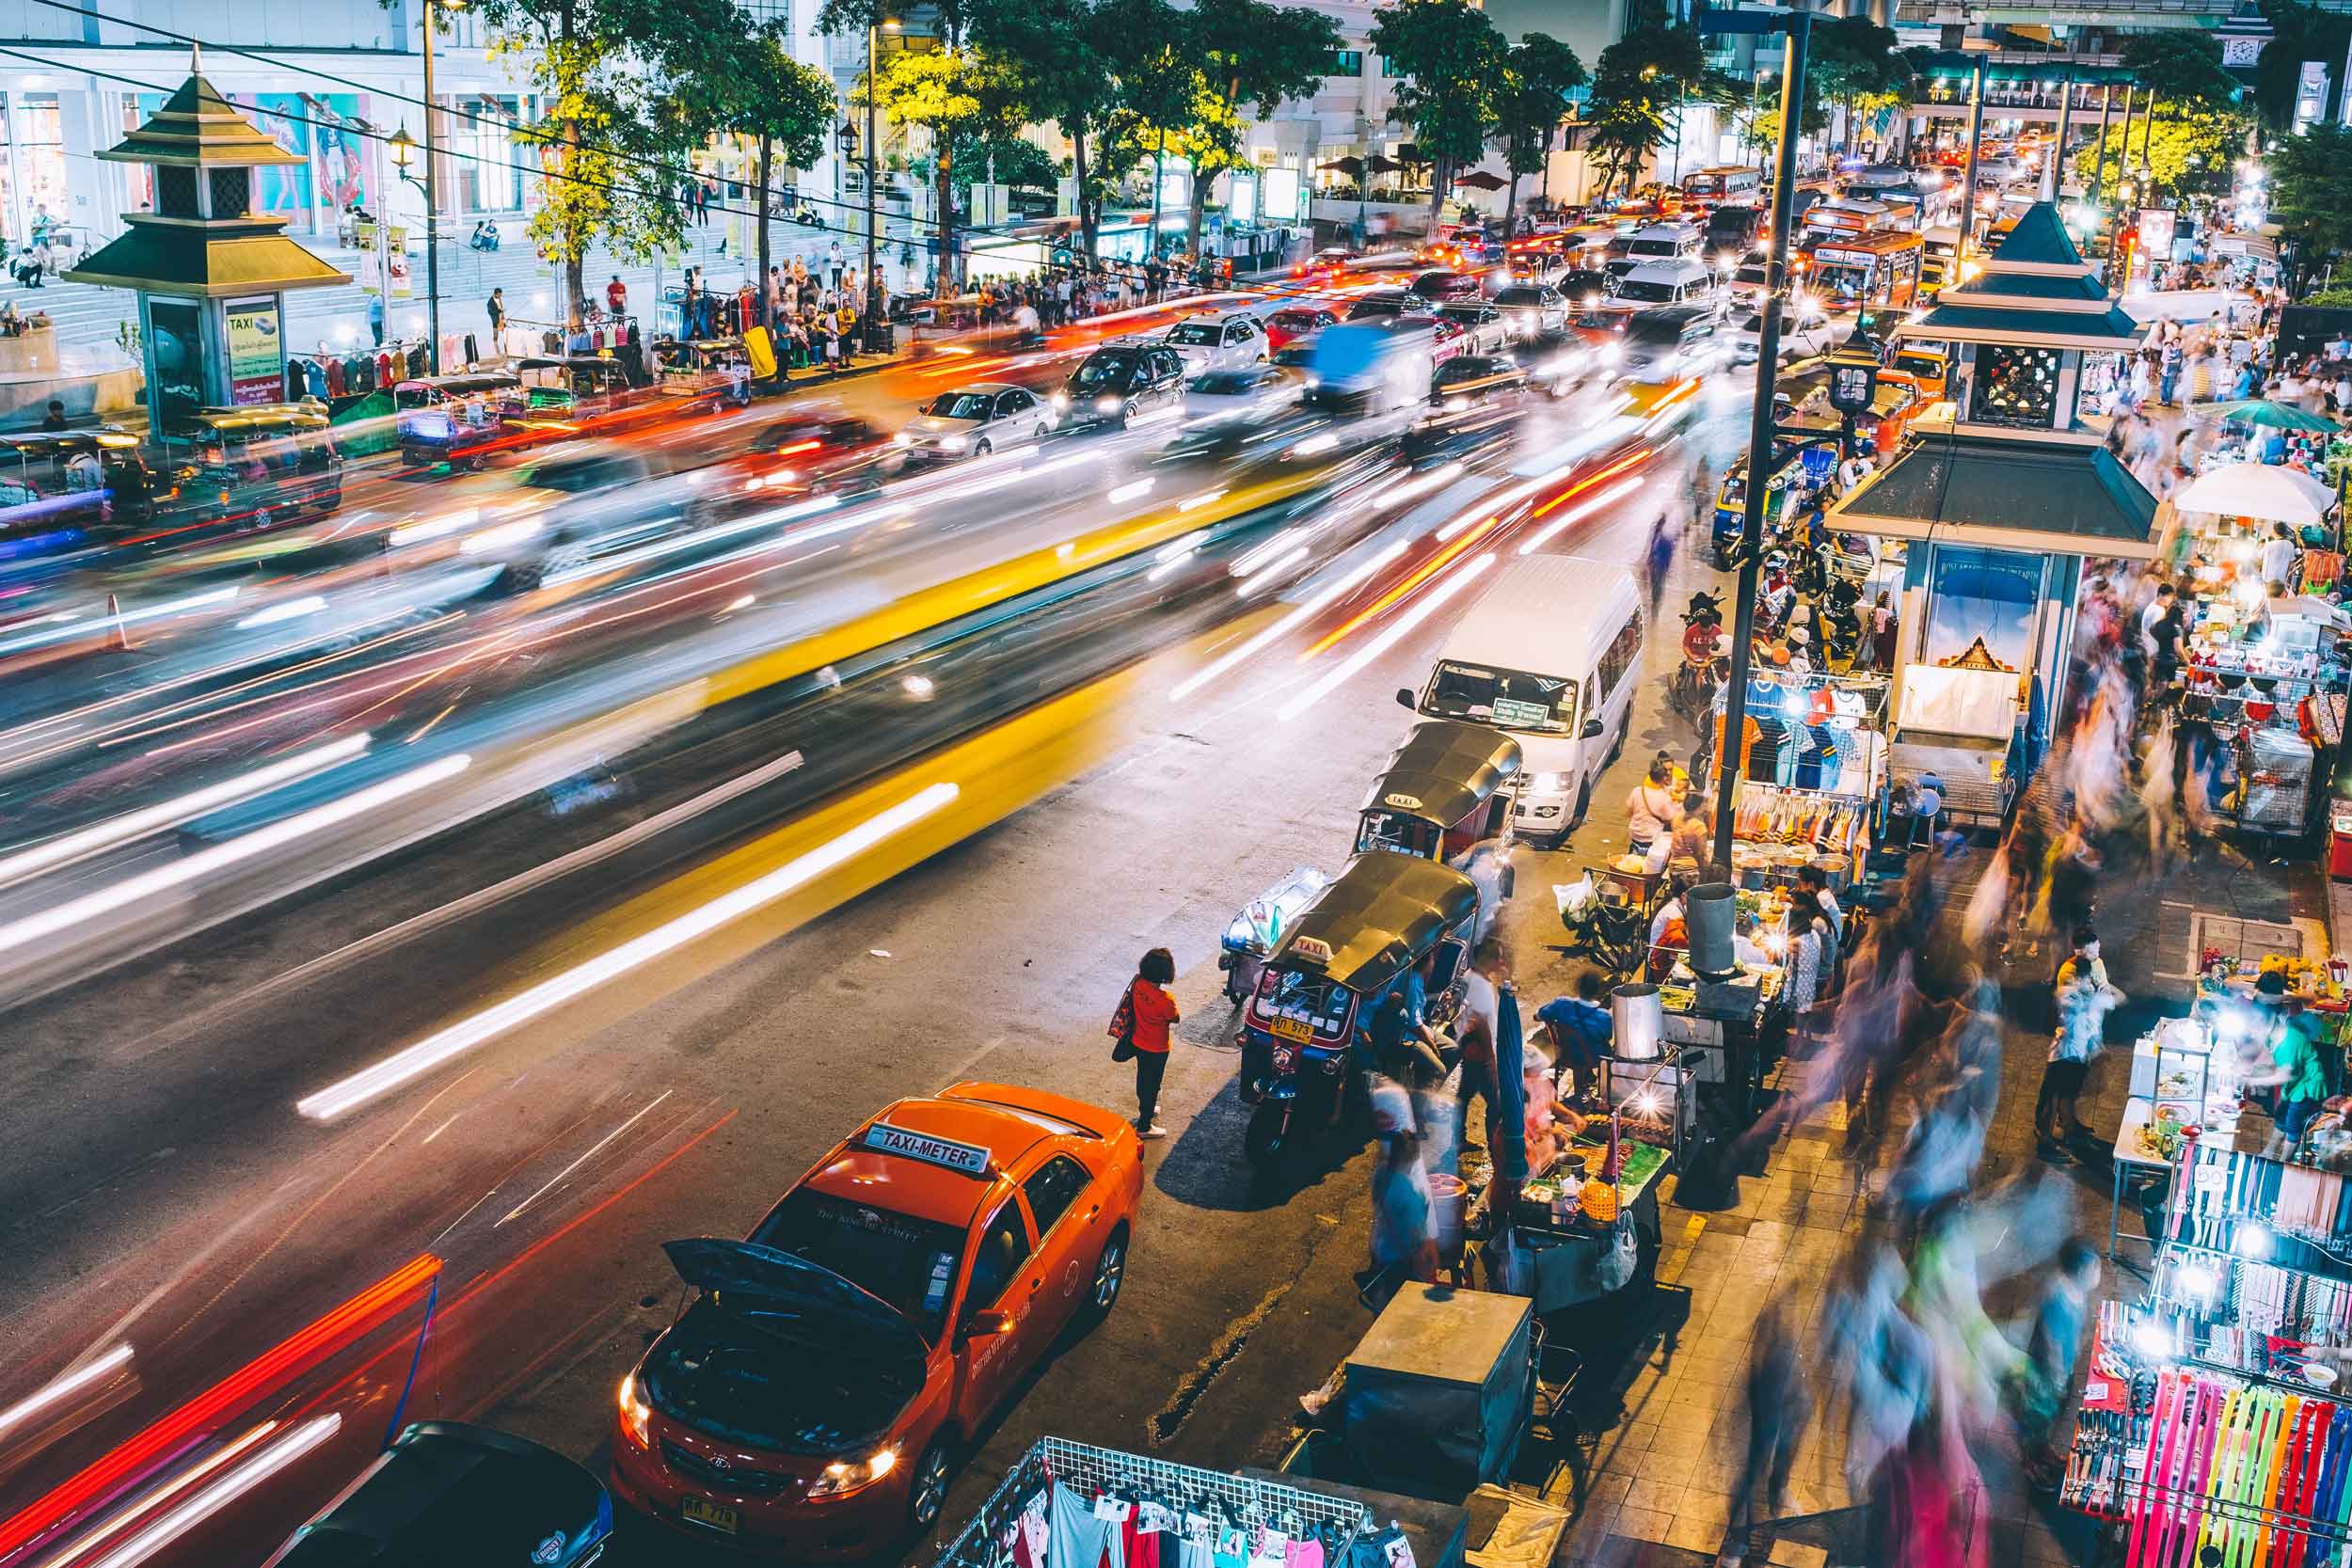
City-Long-Exposure
It’s the same principle as for water-long-exposures. This time, the stationary elements of the photo are the buildings and the moving elements are the cars. With their lights they create those beautiful light trails tracing the city streets.

So the next time you want to go out there to take photos, consider trying night photography. It brings tons of opportunities for creative long exposures and other beautiful photos. Take your tripod, set your camera to manual mode, try to use a low ISO and aperture – and play around with shutter speed. One last important tip: Try to use a camera remote control so you don’t have to touch your camera. Pressing the shutter can cause some shaking and the photo will be blurry. Our Unleashed is a great option for this and can make your next long exposure adventure a lot easier and more enjoyable!
Let us know in the comments what long exposures you like doing the most or what special tips you have for certain scenarios and effects.
Make sure you follow us on Facebook, Twitter and Instagram to get exciting news on Foolography, photography, videography and other interesting topics. Scroll down to subscribe to our quarterly newsletter to stay up-to-date and become part of the Fools. ;-)