Posted on 1 Comment

Michael Ver Sprill (Milky Way Mike) Interview

Photo by Michael Ver Sprill

Today’s blog post is a bit different than usual – we’ve interviewed the truly outstanding timelapse photographer and Unleashed user, Michael Ver Sprill, also known as Milky Way Mike. In this blog post you’ll learn about his journey to becoming a photographer and his tips for the best timelapses, from planning to shooting.

Michael Ver Sprill Headhsot

Quickly introduce yourself: Name, where do you live, favorite photographer, what camera do you use, what kind of photography do you like?

First and foremost, I would like to say thank you for this opportunity and allowing me to test out this fantastic piece of gear that Foolography has developed. My name is Michael Ver Sprill and I currently reside in North Brunswick, New Jersey in the USA. I follow a lot of photographers and it’s extremely hard to pick a favorite. As a landscape photography lover, I guess I would have to say that Max Rive is up there on my list of favorites. A few months back I recently traded in my Nikon DSLRs for the Nikon mirrorless system. So my main camera for still photography is my Nikon Z7 and I like to use the Z6 for time lapse work. As I started my journey to grow as a photographer I had dabbled with photographing just about everything from weddings, real estate, products, baptisms, birthday parties, newborns and portraits. This was all great for learning and gaining experience, but I naturally gravitated towards landscape and nightscape photography, since I loved to travel to the great outdoors.

What got you into night photography, specifically shooting the milky way?

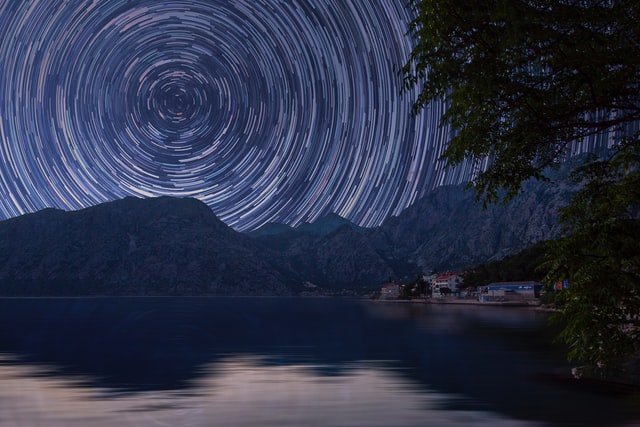
About 8 or 9 years ago, I remember seeing an article which featured a picture of a Milky Way that had been photographed from a beach in New Jersey. Growing up in this state we are surrounded by light pollution from New York City and Philadelphia so we’ve kind of forgotten how beautiful the night sky can get when it is really dark. I got inspired from that article to give Milky Way photography a shot and I got hooked ever since. This obsession led to me travelling cross-country for the first time in my life so I could get a glimpse of some truly amazing dark skies out west, as well as photographing the unique landscapes we have all across America.

<Milkyway Timelapse by Michael Ver Sprill

How do you go about planning your shoots? How long does it take? When do you make a decision to go out?

I like to use Instagram and Pinterest to get inspiration for new locations which I add to my bucket list of places to photograph. Then typically I’ll check google earth so I can examine that location and see if it will work well as a Milky Way location. I’ll also use the app Photopills which allows me to check dates and times for when the Milky Way will be visible in that location during a New Moon phase when the sky is the darkest. Planning this out can take a few minutes to a few hours depending how complex it is to get to the location. Making the decision to go out is the hardest because of the weather. When I go out west it typically has less humidity and is very dry, so clear skies are more frequent compared to where I live in a coastal state. So usually my eyes are glued to the weather channel waiting for clear or mostly clear nights to become available and that will dictate my decision to go out.

Photo by Michael Ver Sprill

What camera accessories are essential and what are nice add-ons (for every hobby photographer and night photographers)?

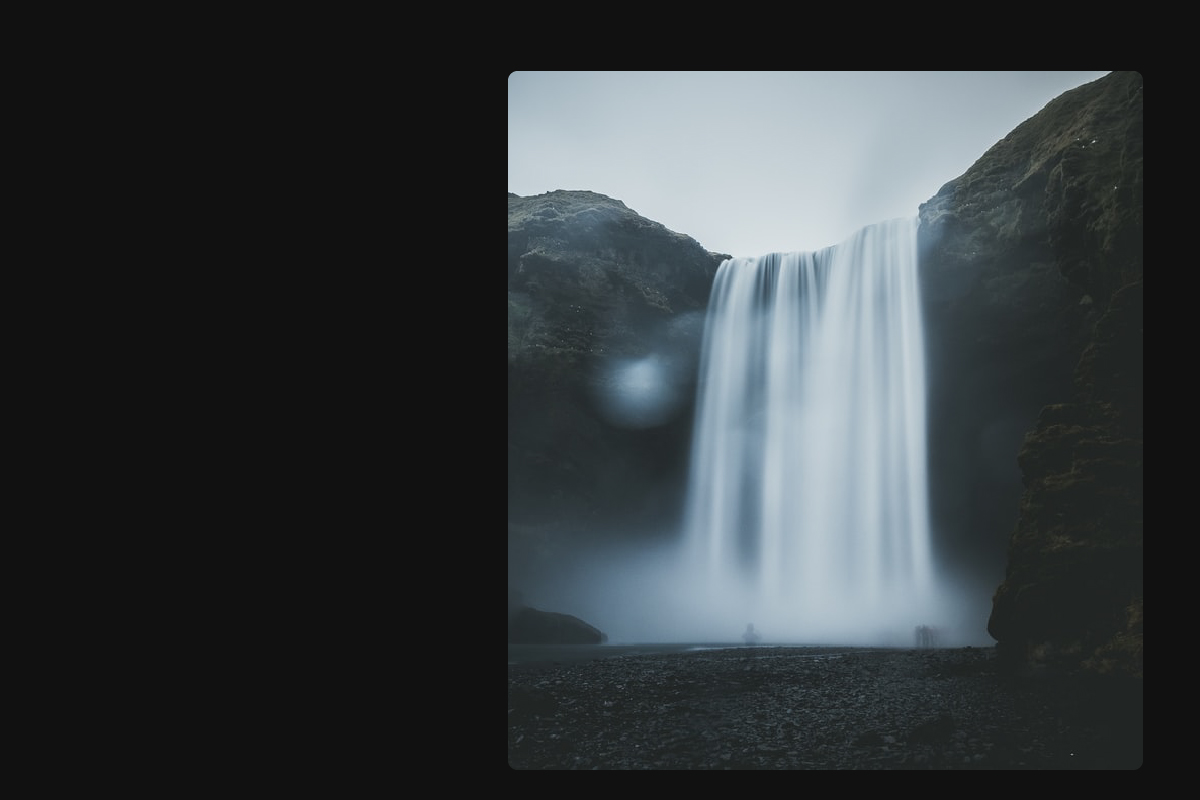
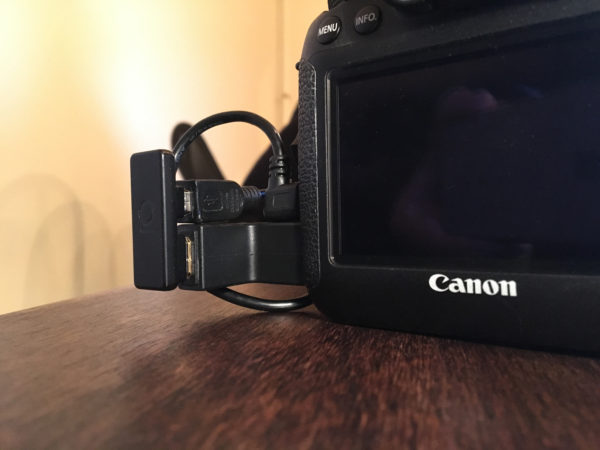
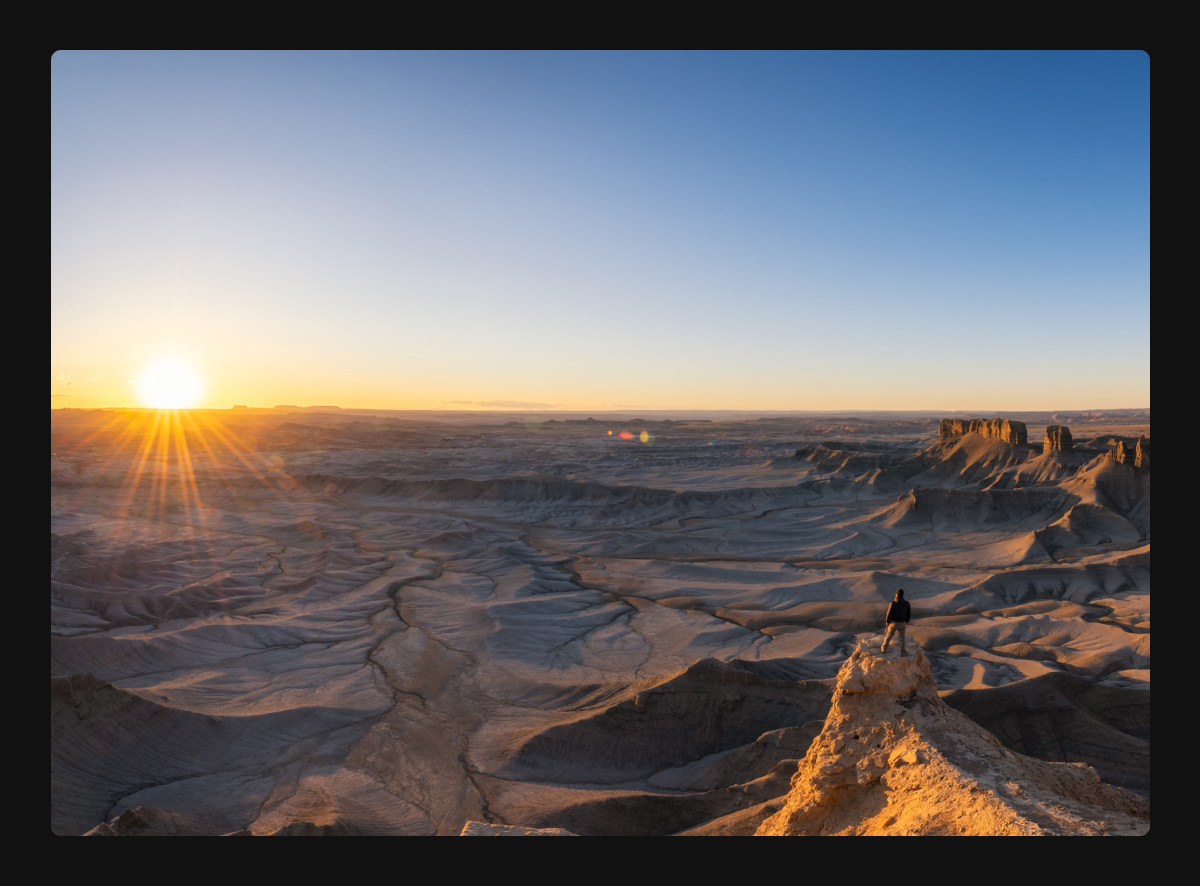
As a landscape and night photographer, a tripod and remote trigger is an essential part of gear that I need to make my photos possible. Typically I am taking photos during golden hour, blue hour and at night, so I need to keep the camera very still as I take long exposures with the help of a remote trigger like Unleashed. Great add-ons would be ND or Graduated filters which allow you to get creative with your long exposures especially during sunrises and sunsets. Another great add-on that comes in handy for me is a Nodal Slider which allows you to pivot from the camera’s lens instead of the camera’s base. This helps prevent parallax when doing panoramas both during the day and at night when doing Milky Way Panoramas.

How do you get the most out of your (night) long exposures? Any tips?

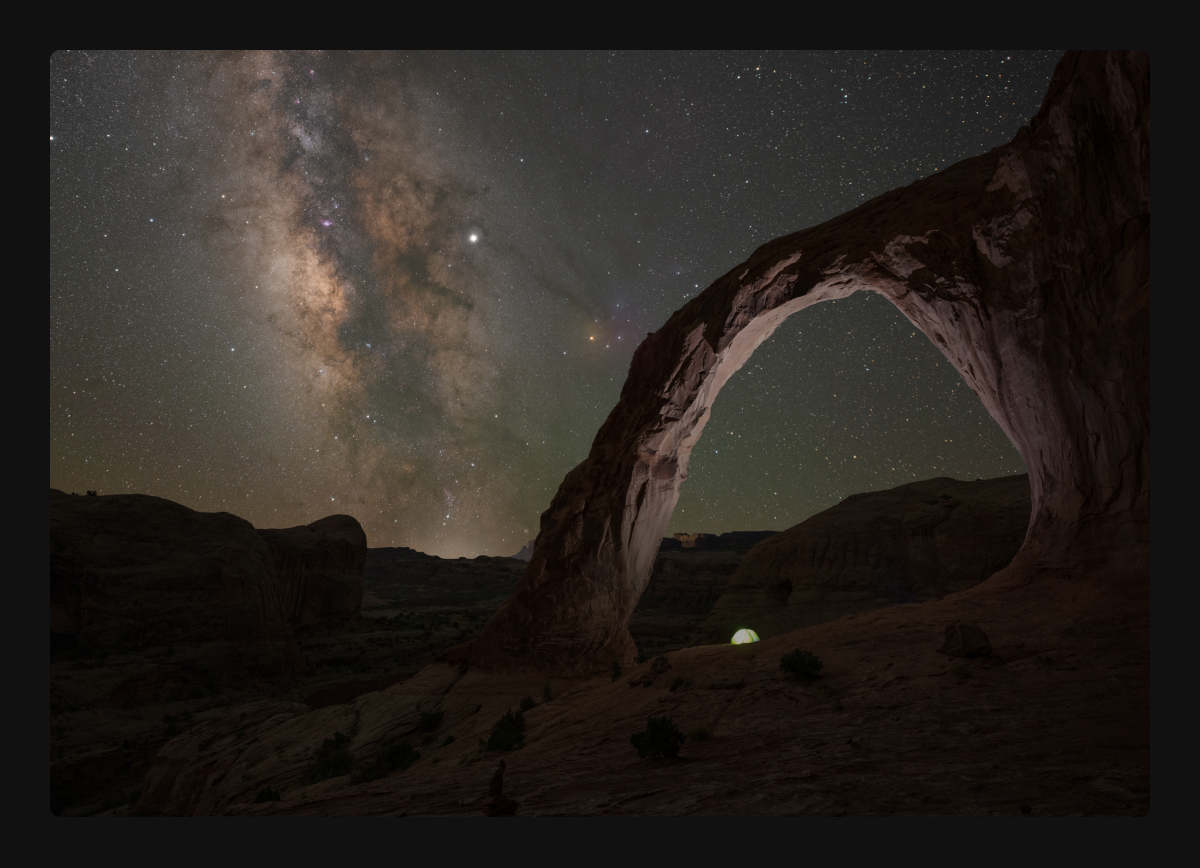
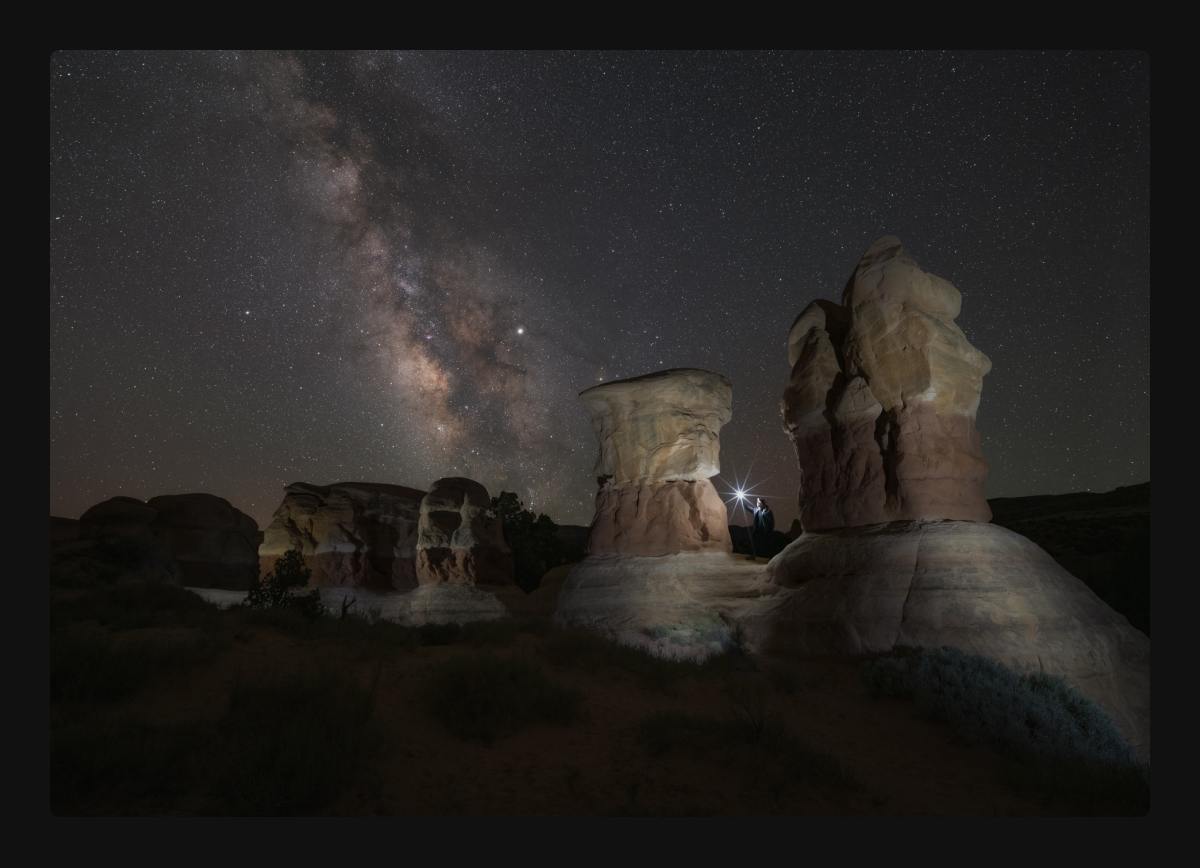
Since we often have to push our ISO when photographing at night, a process called stacking has become extremely helpful with long exposures and Milky Way photography. There are programs like Sequator (for PC) and Starry Landscape Stacker (for Apple) which help track the stars and stack your night photos which essentially reduces the noise by averaging the photos together. I have numerous tutorial videos on Youtube which explain this in more detail to help new night photographers. I also recommend a fast wide angle lens to allow you to gather in more light. One of my new favorite lenses is a 20mm 1.8 prime which is extremely sharp, gathers in a ton of light and perfectly wide for landscape or nightscape photography.

Photo by Michael Ver Sprill

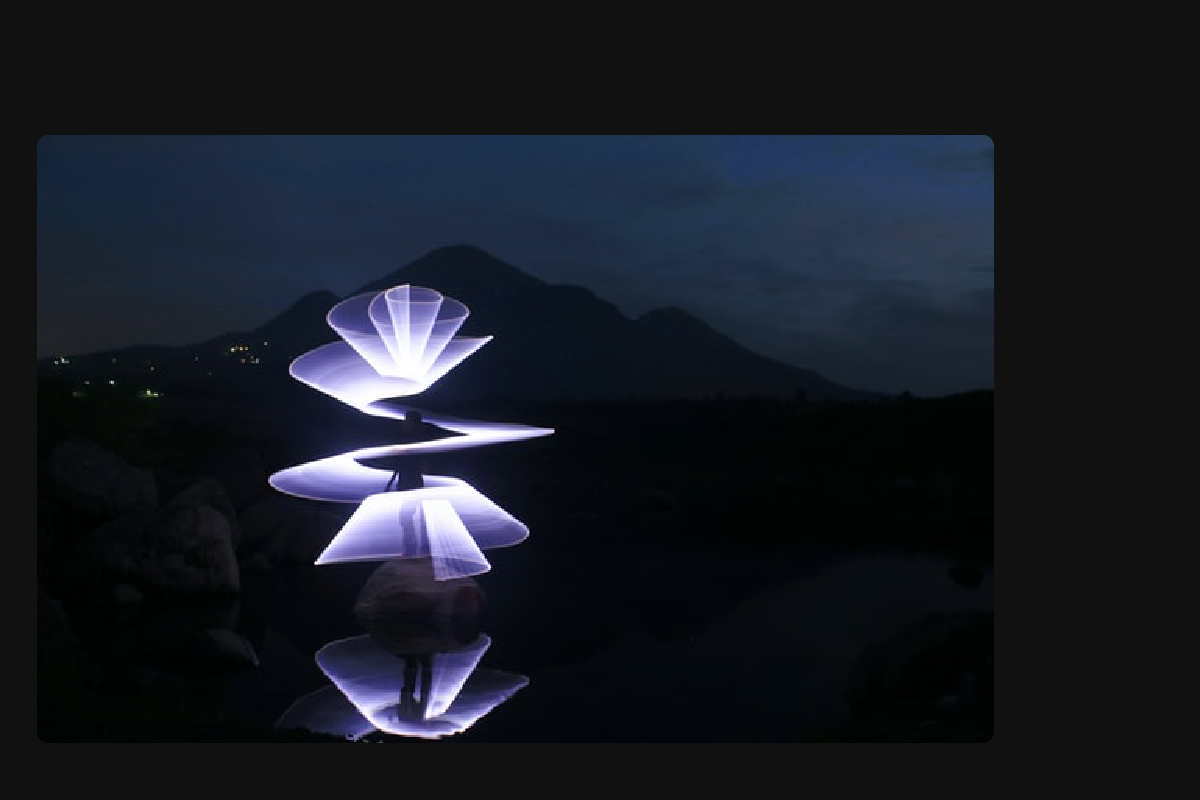
What compositional tips do you have for making your timelapses more interesting?

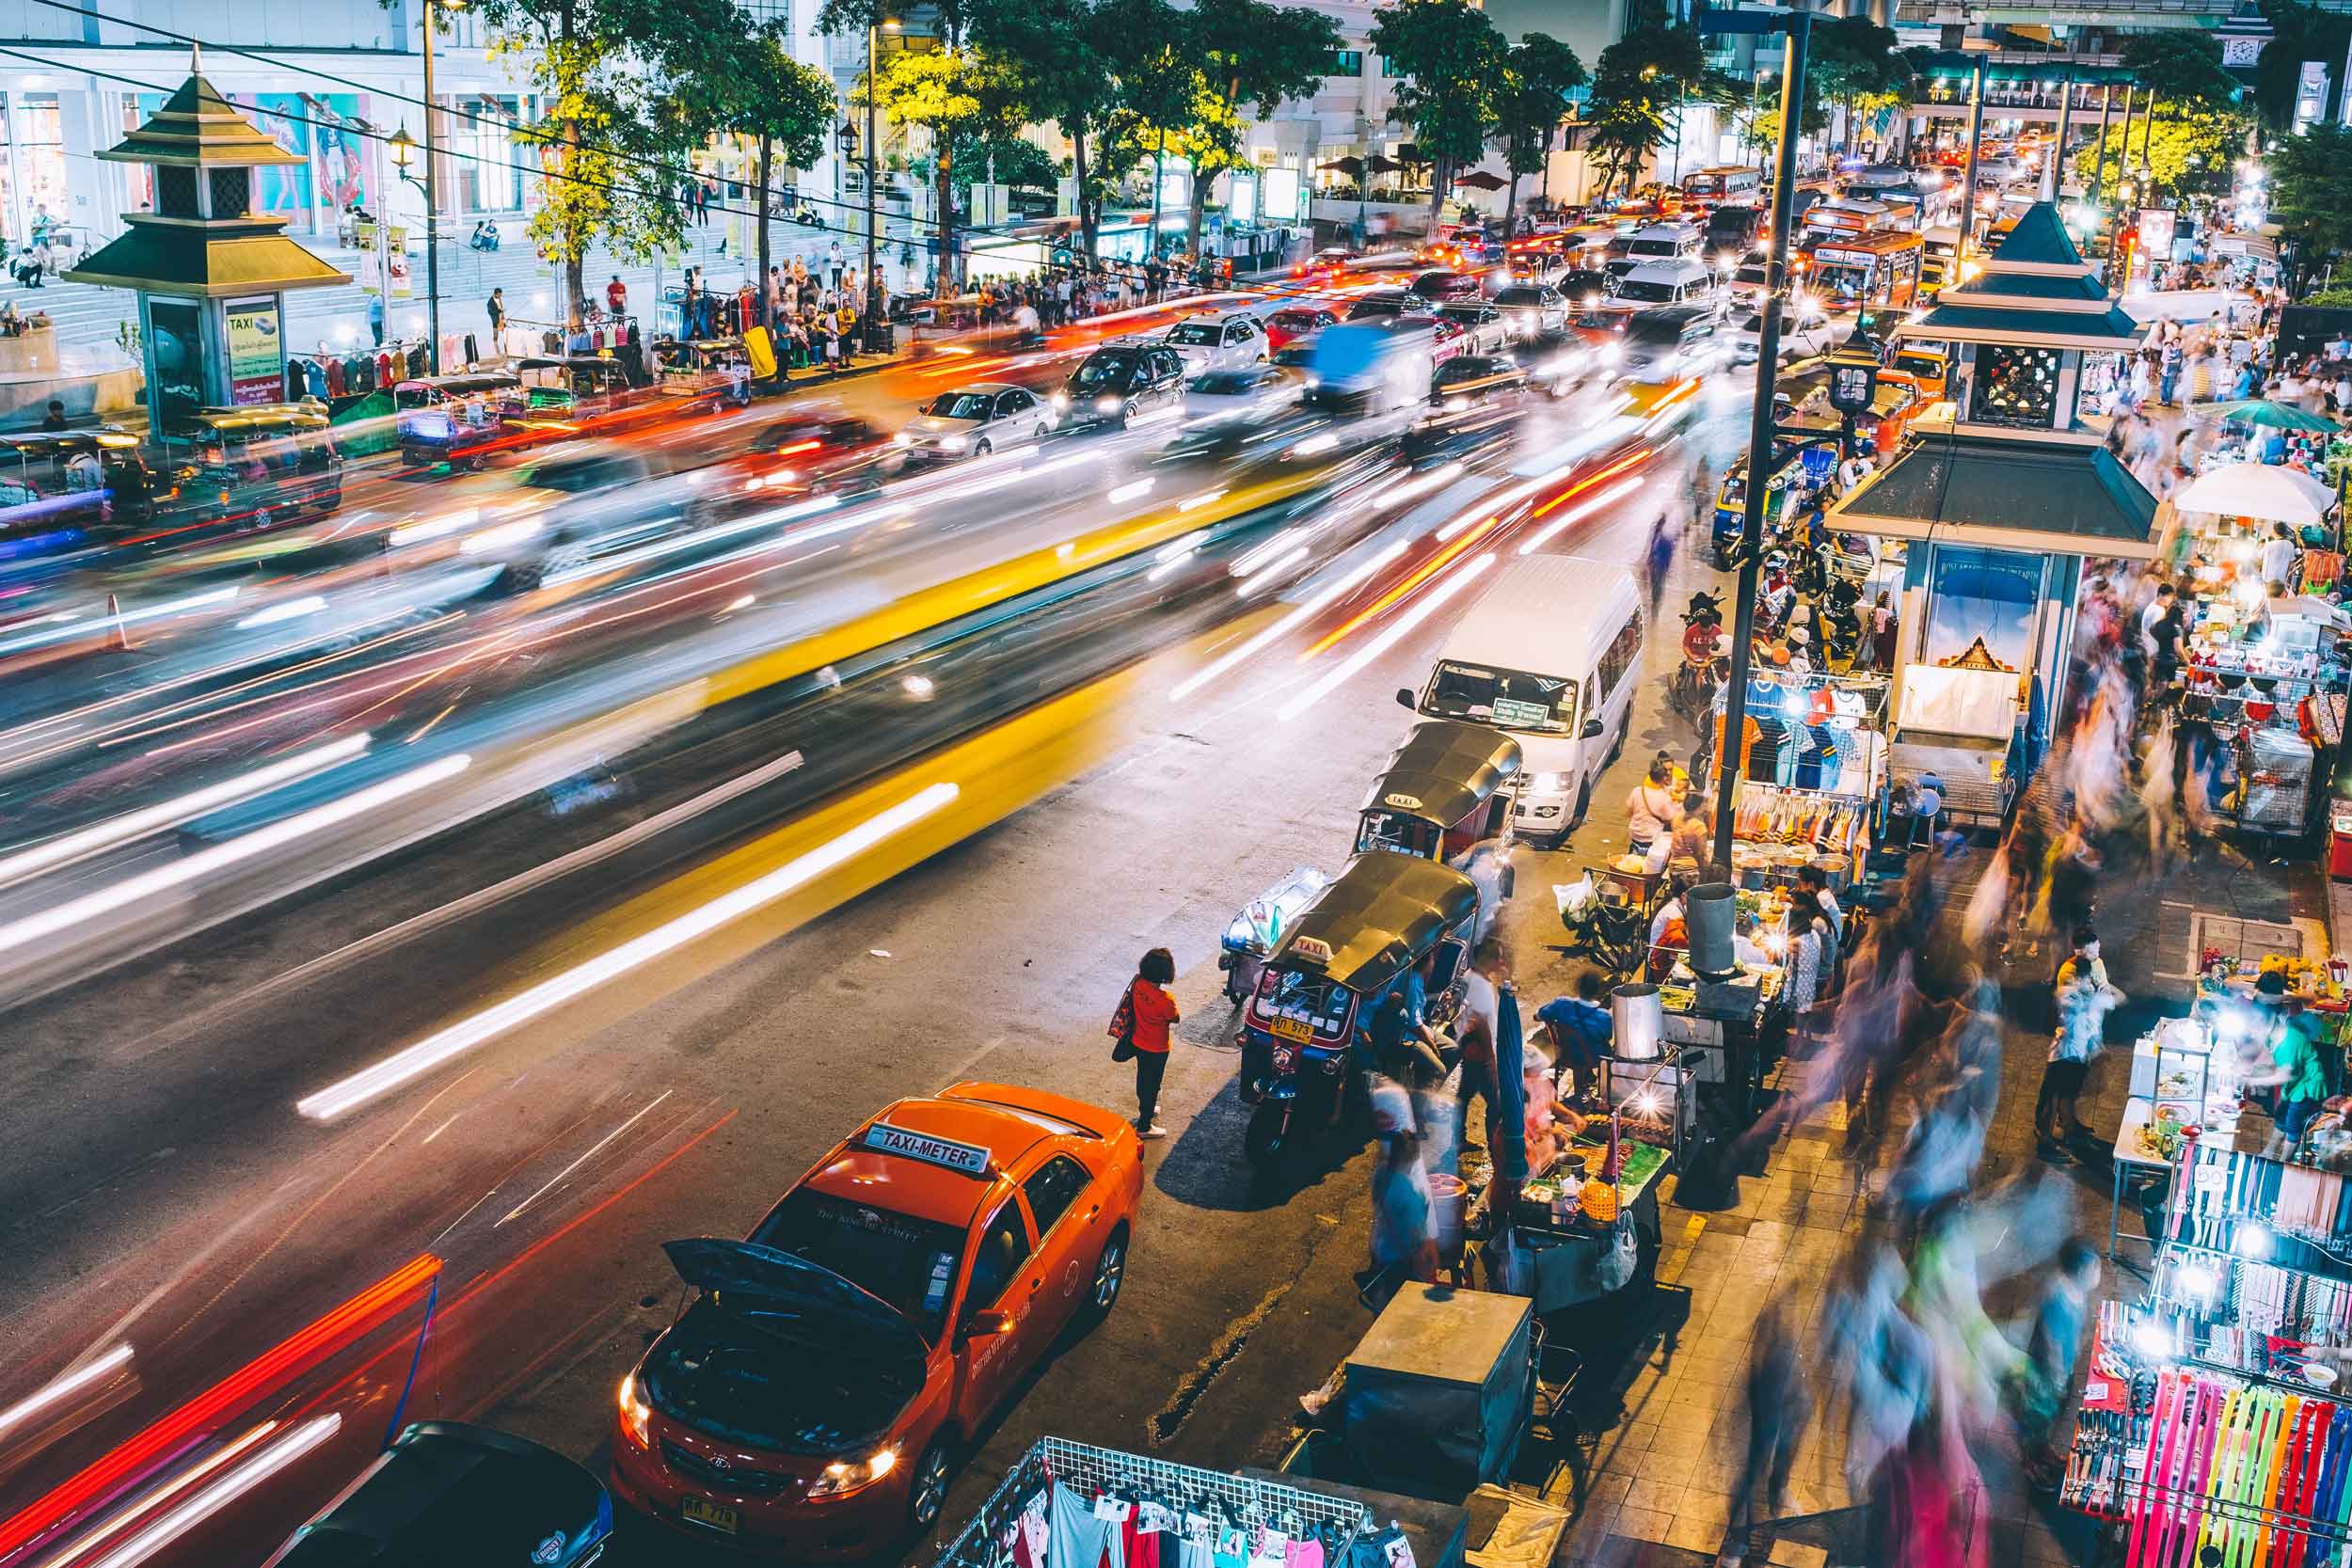
I’ve found that the most important thing with time lapse photography is not necessarily the composition, but actually having elements that show movement. Typically cloudy sunrises and sunsets make for great time lapses. If the sky is clear, then maybe you want to show the movement of shadows drifting across a landscape. It’s all about showing the viewer the movement that happens during a span of time. Now typically when I set up a composition during a timelapse I usually follow the rule of thirds. I tend to keep ⅔ of the composition on the most interesting part of the scene that shows movement with ⅓ on the less interesting part. So for example with a Milky Way time lapse I will tend to keep ⅔ of the sky with ⅓ foreground.

Sunrise Timelapse by Michael Ver Sprill

What photography projects do you have in mind to do next?

I’m about to head up to Acadia National Park in Maine to capture a Milky Way photo from a location that I believe has not been done before. I’m hoping to document that trip in an upcoming vlog for people to see the behind the scenes footage and my editing process.

We’d like to thank Mike for sharing his insights with us and being part of our Foolography Ambassadors team. Be sure to check out his instagram and website to see more of his amazing work!

Posted on Leave a comment

How to Take a Long Exposure With The Unleashed

Upon popular demand, we introduced the Long Exposure feature last summer. The Unleashed offers many technical possibilities, so it was a logical step to implement this. Thus the Unleashed replaces another essential part of a classic intervalometer – in addition to interval photography, it also enables bulb photography without touching the camera. In addition, the Unleashed also offers the possibility to define the length of the photo as desired – just press the shutter once and the rest happens automatically. More on this below. This replaced the Unleashed’s flash compensation feature, which we noticed most users weren’t using much, and made room for the Long Exposure feature. Here’s an overview of how to take stellar long exposures with your Unleashed!

Definition of long exposure photography

In case you’re new to the topic, here is a quick definition: a long exposure is any photo taken with a shutter speed much longer than usual, about 1 second and longer. This allows you to photograph very dark subjects like night skies and capture intentional motion blur in photos. The long exposure time smooths out the movement of water, clouds, cars, etc. creating very smooth, flowing effects.


Using the Unleashed App for long exposures

The first thing you need to know about long exposures are the three ways you can create one. For the first one you simply need to set your exposure time to bulb, making sure you are in manual (M) mode, and hold down the shutter button for as long as you want the exposure to be. This works well up until a certain point, but imagine holding it down for minutes, let alone hours.

Here is where the Long Exposure Duration setting comes in: it allows you to select a precise time in 1/3rd stop increments for up to 4.6 hours. Or choose time mode where you press once to open and once more to close the shutter. In both modes the Unleashed will keep the trigger pressed, so you no longer have to hold it manually. Of course you can also cancel at an earlier time. As usual, the Unleashed keeps shooting even when you close the app, or go out of range with your phone – no need to stay connected or keep the app on!


The long exposure feature is perfect for night photography, star trails, light painting and working with ND filters. For more inspiration and in-depth information on long exposures, check out our blog article about it here.

We hope this helps you better understand and use the Long Exposure function of your Unleashed. Make sure to tag us if you use it – we look forward to your shots!

Posted on 15 Comments

Canon EOS R/RP and others: DIY compatibility with the Unleashed

Canon EOS R

Update: we’ve released the new Unleashed ’22 which is compatible with many more cameras than the Unleashed ’18. Check out the full compatibility list here and pre-order it here.
The article below applies to the Unleashed ’18 only.

In the last year we’ve shipped out many Unleasheds to customers all over the world and the feedback has been great. Since then we’ve also implemented improvements, new features and have published many app and firmware updates.

Of course, we’ve also received quite a few requests regarding the compatibility of certain Canon cameras that are not (yet) on the compatibility list, most of all the Canon EOS R line. Another favorite is the 70D, and the same goes for the 200 II, 250D, 50D, 90D, 850D, 7D Mark II and the 1DX. Unfortunately, for both of us, Canon decided to mix things up a little. These cameras either have a new USB-C socket or the arrangement of the USB and HDMI socket is different from all their other cameras. As a result, the Unleashed is physically not compatible. All of these cameras are more or less unique in their socket arrangement, so we would have to develop and produce a new Unleashed model for each of these camera models, which is not feasible – at least at this point.

Using the Unleashed with adapters

The good news is that just because they don’t fit the camera body directly, that doesn’t mean the Unleashed won’t work on them. In fact, the Unleashed’s firmware (and therefore all of its functionality) is absolutely compatible with these cameras! The only thing necessary are two adapters or extensions depending on the camera. Of course, you’ll lose the conveniently small design of the Unleashed, which normally blends seamlessly into the camera’s design. But if you’re after the feature-set and don’t mind the cables, this allows you to use the Unleashed and all its features.

Want to shoot day-to-night “Holy Grail” time lapses with your new EOS R5? Geotag with the 7D Mark II, shoot long exposures with the 70D? Wirelessly start video recording with multiple 90Ds on tripods? Well, now you can! Read on to find out exactly which adapters you’ll need.

List of adapters

For every Canon camera that is not yet officially compatible, we recommend using the Unleashed C1, since it has more space between its HDMI and USB plug than the Unleashed C2 does. On all Canon cameras, except the EOS R5 and R6, you’ll need a Mini-HMDI (HDMI type C) extension. Canon EOS R5 and R6 need a Micro HDMI (HDMI type D) (plug) to Mini HDMI (socket) adapter. Depending on your camera, you’ll additionally need the following USB adapter cable:

  • Canon EOS R, RP, R5, R6 & 1Dx Mk III: Micro-USB socket to USB-C plug
  • Canon 7D Mk II, 90D, 200 II, 250D & 850D: Micro-USB socket to micro-USB plug (i.e. micro-USB extension))
  • Canon 1Dx, 50D & 70D: Micro-USB socket to mini-USB plug

(Just for clarification: socket = female, plug = male)

If you already have an Unleashed C2 for another camera, the adapters listed above will need to have a mini-USB socket (and the camera-dependent plug) instead of a micro-USB socket.
Example: for a Canon EOS R5 you’ll need a mini-USB socket to USB-C plug adapter.

Update from July 2021: We are now selling the adapter sets in our shop! You can find them here or by navigating through Entagged > Accessories.

A mini HDMI extension is actually quite hard to find, however, there is a 90 degree adapter available that we found, and can confirm that works. It’s called: “Manhattan 353458”. The only alternative we have found so far are so called “FPV HDMI cables”, but even here HDMI C Socket to HDMI C Plug are not commonly found.

Here’s what the Manhattan Adapter and a USB extension cable look like:

Manhattan Adapter on Canon

We know it’s not ideal and we would love to have a perfect Unleashed model for each camera! However, for now, we believe it’s definitely a solution/hack/work-around worth looking at. Of course, for some of the newer cameras, we’re also working on dedicated Unleasheds, so stay tuned for those! Subscribe to our newsletter to be the first to know, or follow us on social media to stay up-to-date!

Let us know in the comments what you camera you have and what you think.

Posted on 2 Comments

How to? – Long Exposure

How-to-do-long-exposure 

As we’re reviving our blog, we thought it would be great to introduce a series that is about photography and film making itself. Terminology, basics, techniques and hacks. At some point we hope to get other photographers to share their best practices or their newest “how-to”. Let’s see where this takes us. Our final goal is to see people flourish in what they love doing – so we want to help in the best ways we can. And since we’re kind of into this photography thing, we want to engage with other photographers and filmmakers all over the world. So if you love your camera or are just getting started: This is the right place for you. :-)

We know, in general, there are many ways to reach a certain goal. It’s the same when taking photos or videos. That’s why, whenever we or someone else posts something, we want to start a conversation and discuss ideas.

Today, we want start off the series by looking into some of the basics behind long exposures.

LONG EXPOSURE PHOTOGRAPHY

A small excursion into the making of a photo: A photo needs exposure to be able to show what you photographed. Exposure is the amount of light hitting the electronic image sensor – or in earlier days – the photographic film. It determines how bright or dark a picture is in the end. This is variable, so the “perfect” exposure length varies from photo to photo. It all depends on the effect you want to achieve. In the end there is no “correct” exposure length for a given subject – in the end it is very much subjective.

In photography, the exposure is determined by the shutter speed, aperture (the opening of the lens) and ISO (which basically controls the brightness and darkness of your photo). It’s a formula of three variables. For long exposures, you still consider all three variables. But here, shutter speed is the significant factor: It is the only variable that actually has a connection to time. That’s why it’s called “LONG” exposure. So the idea behind the long shutter speed is, that, because of the time factor, you’re able to catch (more) movement – things that happen over a period of time. And in the end, movement is what makes for a typical long exposure shot.

Typical scenarios where long exposures are used:

Night Photography

Night photography deserves an own article since the topic is huge. There are many ways to take photos at night, but one thing is certain: To avoid a super dark photo and a lot of noise (due to high ISO), you have to use a slow shutter speed. Even with a very low aperature (lower than f2), at some point the lens cannot be more open to catch more light.

  Night Photography

Star Trails

Even though it’s part of night photography, catching star trails is a category of its own. It involves special techniques (bulb mode, stacking etc.) and a lot of preparation and timing. The idea behind it is to catch the stars’ movement, caused by the earth’s rotation, which creates fascinating light trails.

Light Painting

Here, you keep the scene very dark and use a light source (flashlight, fire, smartphone LED) to “paint” something in the air. As the shutter stays open and the (bright) light source is moving, you get crystal clear lines of light. You can even write entire sentences this way.

  Light Painting

Water-Long-Exposures

Long exposures of moving water create a very mystic/misty look. It’s quite often used in combination with the HDR technique. The objects framing the water stay sharp – this creates tons of interesting composition options.

City-Long-Exposure

It’s the same principle as for water-long-exposures. This time, the stationary elements of the photo are the buildings and the moving elements are the cars. With their lights they create those beautiful light trails tracing the city streets.

Car Light Trails  

So the next time you want to go out there to take photos, consider trying night photography. It brings tons of opportunities for creative long exposures and other beautiful photos. Take your tripod, set your camera to manual mode, try to use a low ISO and aperture – and play around with shutter speed. One last important tip: Try to use a camera remote control so you don’t have to touch your camera. Pressing the shutter can cause some shaking and the photo will be blurry. Our Unleashed is a great option for this and can make your next long exposure adventure a lot easier and more enjoyable!

Let us know in the comments what long exposures you like doing the most or what special tips you have for certain scenarios and effects.

Make sure you follow us on Facebook, Twitter and Instagram to get exciting news on Foolography, photography, videography and other interesting topics. Scroll down to subscribe to our quarterly newsletter to stay up-to-date and become part of the Fools. ;-)